Work with Pages and understanding Art Journaling

February 05, 2012

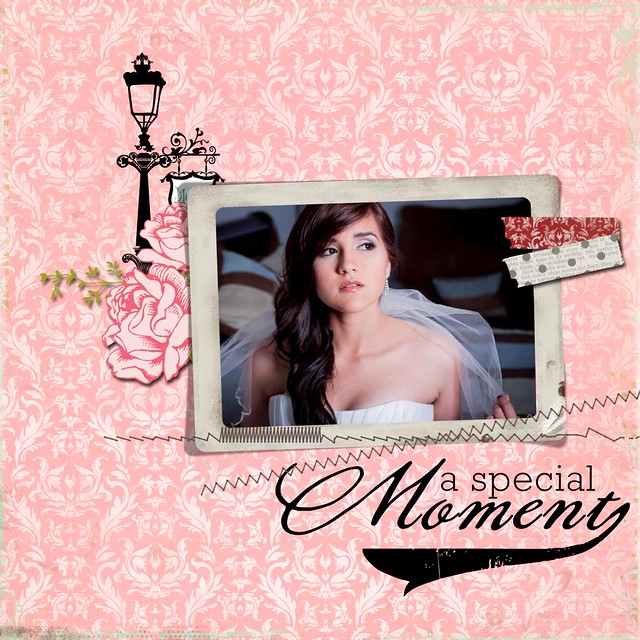
A very Sweet Baby

This is my Baby Boy Luis! WHo I tanks God everyday! He's just a very Sweet Boy!

Creadits:
Ki-Digital Paper Pack Hot Date, KI-Digital Brads-Hot Date, baker's twine photo megapack ESSENTIALS - Stitches v1 Splendid Films

January 16, 2012

Take your Scrapbooking to the next level! Digital Art!!

Are tired of the same old, same old looking of your Scrapbook pages!!  then it is time to step it Up!!  and create something that really define your style and true artist!

Jessica Sprauge is offering a new class in Digital Art!  what is Digital Art!  well is an artistic way to portrait your real you!  You dont need to know how to draw or even doodle!!  you just need to let your creativity flowwwwssssss!!

Art journaling is the process of creating a visual diary - a very personal look at your own inner landscape, but also a place to experiment with art and mixed-media techniques that you can use in other projects, or that become an art form in and of themselves. For the first time ever, Jessica is teaming up with renowned artist & designer Nancie Rowe Janitz to bring you a class that combines traditional art journaling techinques with the ease and sophistication of a digital format! In this four-week instructor-led class, complete with an exclusive 200+ piece kit designed by Nancie, you'll jump-start your creativity and learn gorgeous mixed media techniques to add to your digital projects.

Take a look to this examples!...  Super Cool ahhh!!   And you can learn how to do all this plussss moreee! super cool stuff!!  just check out the class ..Im sure you will love as much as I do!!


Cheers, Jackie :)

Disney For Quick Fun Vacation

Hi Everyone!
Here some LO's I just did from my trip to Florida!  Where I spend the Most Fun Vacations with my Mom, Sisters and Aunt! It was one of the best weekends ever!!  I wish we will be able to do more often!!


Material are all available @ JessicaSprauge Store!!

Cheers, Jackie :)

January 11, 2012

Great Winter sael @ Jessicas Store!

Good Morning everyone!

Just a quick note!!  Jessica Sprauge store have a great sale this week!  50% off on a bunch of stuff!!

Check it out..is your time to replenish your stock and Scrap all Winter long!

Cheers, Jackie :)

January 09, 2012

Chicken Rollatini Stuffed With Zucchini And Mozzarella

New Year Resolutions!  Be less heavy and more active and eat better?? then here is this Chicken Rollant make over...!


What you need??
Ingredients:
  • 1 tsp olive oil
  • 4 cloves garlic, chopped
  • 1 1/2 cups (1 medium) zucchini, shredded
  • 1/4 cup + 2 tbsp Romano cheese (or parmesan)
  • 3 oz part skim shredded mozzarella
  • salt and pepper to taste
  • 8 thin chicken cutlets, 3 oz each
  • 1/2 cup Italian seasoned breadcrumbs
  • 1 lemon, juice of
  • 1 tbsp olive oil
  • salt and fresh pepper
  • olive oil non-stick spray 
How to make it??
Directions:
  • Wash and dry cutlets, season with salt and pepper.  Preheat oven to 450°. Lightly spray a baking dish with non-stick spray.
  • In a large skillet, heat oil on medium-high heat. Add oil when hot then saute garlic a minute, or until golden. Add zucchini, 1/4 cup Romano cheese, salt and pepper and saute about 3-4 minutes, stirring occasionally. Set aside to cool. When cool, add mozzarella cheese and mix to combine.
  •  Lay chicken cutlets down on a working surface and spread 3 tbsp of zucchini-cheese mixture on each cutlet. Loosely roll each one and keep seam side down.
  • Combine breadcrumbs and grated cheese in one bowl; in a second bowl combine olive oil, lemon juice, and pepper in another bowl.
  • Dip chicken in lemon-oil mixture, then in breadcrumbs and place seam side down in a baking dish (no toothpicks needed). Repeat with the remaining chicken. When finished, lightly spraywith oil spray.
  • Bake 25 - 30 minutes. Serve immediately. Serving size is listed as one, but if you are having this as a low carb meal with a salad, I suggest you have two.
And here is the fineshed product!  Pretty Good!!ahh!  :)

Cheers, Jackie :)
Adapted from skinnytaste.com

January 04, 2012

White Wedding Cake Cupcakes

Yield: 36 cupcakes

Prep Time: 15 min
Cook Time: 18 min
I'm not usually one to use a boxed cake mix and doctor it up. I'm more accustomed to using entirely homemade recipes, but this one caught my eye and looked good. These turn out delicious, moist and fluffy cupcakes- perfect for holding buttercream frosting.

Ingredients:


1 (18.25 ounce) box white cake mix
1 cup all-purpose flour
1 cup granulated white sugar
3/4 teaspoon salt
1 1/3 cups water
2 Tablespoons vegetable or canola oil
1 teaspoon vanilla extract
1 cup sour cream
4 large egg whites

Directions:


1. Preheat oven to 325°F. Place cupcake liners in cupcake pans (you'll need approx. 36).
2. In a large bowl, whisk together cake mix, flour, sugar and salt. Add remaining ingredients and beat with hand mixer for 2 minutes, or until well blended.
3. Use ice cream scoop to fill prepared cupcake tins- fill about 3/4 full. Bake about 18 minutes, or until toothpick inserted in center comes out clean.

Tips:


*Recommend: Duncan Hines "Moist" White Cake mix for this recipe.
*You can use either regular or light sour cream for this recipe, but heck... since it's a wedding cupcake and you want it to be as delicious and moist as possible, I recommend going for the full-fat kind.
*Add 1 teaspoon of almond extract (in addition to the vanilla) if you wish to have a different flavor.
*Using an ice cream scoop is perfect for getting the batter into the cupcake tins without spilling.
*You can also use this mix to make cake. Pour into greased and floured cake pans. Bake until toothpick inserted in center comes out clean.

Enjoy,
 Jackie :)
Source: RecipeGirl.com

January 03, 2012

Edward Kostyra's Birthday Cake

Ingredients

For The Frosting
16 ounces semisweet chocolate, very finely chopped
2 2/3 cups heavy cream
1 teaspoon light corn syrup

For The Cake
1 cup (2 sticks) unsalted butter, room temperature, plus more for pans
1 1/2 cups all-purpose flour, plus more for pans
1 1/2 cups cake flour, not self-rising
1 tablespoon baking powder
1 teaspoon salt
1 3/4 cups sugar
4 large eggs
2 teaspoons pure vanilla extract
1 1/4 cups milk

For The Orange Curd
12 large egg yolks
Zest of 2 oranges
1/4 cup plus 2 tablespoons freshly squeezed orange juice
1/2 cup plus 1 tablespoon freshly squeezed lemon juice
1 1/2 cups sugar
1/4 teaspoon coarse salt
1 cup (2 sticks), plus 5 tablespoons unsalted butter, cold, cut into small pieces

Directions:


Make the frosting:

  • Place chocolate in a medium heatproof bowl. In a heavy saucepan over medium heat, bring cream to a boil and immediately remove from heat. Pour over chocolate and let sit, undisturbed, for 3 minutes. Gently whisk until combined and smooth. Whisk in the corn syru
  • Let cool to room temperature, then transfer ganache to refrigerator and chill, stirring frequently and scraping the sides of the bowl with a spatula, until slightly stiff and cool enough to spread, about 1 hour. If frosting becomes too firm, briefly place bowl over a saucepan of simmering water and stir until desired consistency is reached. Frosting should be smooth and spreadable, but not runny.


Making the Cake

  1. Preheat oven to 350 degrees. Butter two 8-by-2-inch round cake pans; line the bottoms with parchment paper. Butter parchment and dust with flour, tapping out excess; set aside. Into a medium bowl, sift together flours, baking powder, and salt; set aside.
  2. In the bowl of an electric mixer fitted with the paddle attachment, beat the butter and sugar until light and fluffy, 3 to 4 minutes, scraping down the sides of the bowl as needed. Beat in eggs, one at a time, and then beat in vanilla. With the mixer on low speed, add the flour mixture in three parts, alternating with the milk and beginning and ending with the flour; beat until combined after each addition.
  3. Divide the batter between the prepared pans and smooth with an offset spatula. Bake, rotating the pans halfway through, until the cakes are golden brown and a cake tester inserted in the centers comes out clean, 30 to 35 minutes. Transfer pans to a wire rack to cool 20 minutes. Invert cakes onto the rack; peel off the parchment. Re-invert cakes and let them cool completely, top sides up.

Make the orange curd: 
  1. Combine yolks, orange zest, orange juice, lemon juice, and sugar in a heavy-bottom saucepan; whisk to combine. Cook over medium-high heat, stirring constantly with a wooden spoon or heatproof spatula (be sure to scrape the sides of the pan), until the mixture is thick, about 8 to 10 minutes. Let mixture come to a vigorous simmer and cook, continually scraping sides of pan, for 2 minutes.
  2. Remove saucepan from heat. Add salt and butter, one piece at a time, stirring until smooth. If desired, strain through a fine sieve into a medium bowl. Cover with plastic wrap, pressing it directly onto the surface of the curd to prevent a skin forming. Refrigerate until chilled and very firm, at least 2 hours or up to 1 1/2 weeks.
Assemble cake:
  1. Using a serrated knife, trim the tops of the cakes to make level. Split each layer into two, for a total of four. Place bottom layer on a rotating cake stand and with an offset spatula, carefully top with 1/2 cup of orange curd, leaving a 1-inch border. Place the second cake layer on top, spread with another 3/4 cup of the orange curd. Repeat with the third layer; top with the final cake layer. Insert 3 wooden skewers into the top of the cake to secure.
  2. For the crumb coat, spread the entire cake with a thin coat of frosting using an offset spatula. Chill for at least 30 minutes.
  3. Spread the entire cake with remaining frosting, swirling to coat in a decorative fashion. Serve immediately, or refrigerate, covered with a cake dome. Let sit at room temperature for about 20 minutes before serving.


Enjoy,
Jackie :)

December 06, 2011

Basic Vanilla Cookie Dough

Ingredients

  • 3 cups all-purpose flour
  • 3/4 teaspoon baking powder (omit if making thumbprints, ball cookies, or spritz cookies)
  • 1/2 teaspoon salt
  • 2 sticks unsalted butter
  • 1 cup sugar
  • 1 large egg
  • 2 teaspoons pure vanilla extract

Directions

  1. Whisk together flour, baking powder, and salt in a large bowl. Beat butter and granulated sugar with a mixer on medium-high speed until pale and fluffy. Beat in egg and vanilla. Reduce speed to low. Add flour mixture, and beat until combined. Proceed with variations:
Note:

For tinted cookies, add drops of gel-paste food coloring once the flour is incorporated. If you'd like to try a variation, see what ingredients to add:
Spice Cookie Dough
Chocolate Cookie Dough
Citrus Cookie Dough

Cheers,
Jackie :)

Credits: Martha Stewart Living, December 2010

November 30, 2011

Bebidas para las fiestas Navideñas

Bebidas
Bebidas
Todas las navidades, mi cocina se llena de botellas vacías, corchos, potes y envases, todo lo necesario para preparar, curar, empaquetar las mezclas de ese año  para regalar y saborear.
Los licores son vistosos, sencillos y puede prepararlos fácilmente. Comience a guardar botellas vacías para empaquetarlo y decorarlo antes de regalarlo. Es ideal para llevarle a los anfitriones de alguna fiesta.
Pero no se olvide del tradicional coquito, receta que incluyo también, lo tradicional siempre debe estar. Comience hoy para que estas fiestas lleve un poco de sabor y amor envuelto como regalo.

Licor de Café y naranja

1 pote de café instantáneo
4 tazas de azúcar
2 tazas de agua hirviendo
1 botella de ron oro
1 botella de vodka
1 vaina de vainilla o 1 cda de extracto de vainilla
cáscara de 3 chinas

Mezcle el azúcar, café y agua hirviendo hasta disueltos, el azúcar y el café. En un recipiente una con el resto de los ingredientes. Embotelle y guarde en un lugar oscuro por 2 semanas. (Mientras más tiempo, más sabor) .
Puede voltear y mover la botella todos los dias. Para embotellar para regalo, cuele y pase a botellas limpias.

Licor de Arándanos (Cranberries)

1 paquete de cranberries
1 taza de azúcar
2 tazas de sirop de maíz claro
2 tazas de vodka
1 taza de agua
_ taza de ron oro
Caliente los arándanos con el azúcar mientras los presiona para romperlos. Añada el sirope y mezcla bien. Retire del fuego y refresque. Mezcle los arándanos con el resto de los ingredientes
Y coloque en recipiente con tapa. Deje reposar en un lugar oscuro por 2 semanas. Cuele y embotelle.

CREMAS
En Puerto Rico el coquito es sinónimo de Navidad. otros países también celebran con una receta equivalente y en este libro incluyo algunas.

Coquito

4 latas de leche evaporada
4 latas de leche condensada
2 latas grandes de leche de coco dulce (Coco López)
6 yemas de huevo
1 botella de ron blanco
2 cdas de canela
1 cda de vainilla
1/4 a 1/3 taza de brandy o ron perfumado

En una licuadora bata las yemas de huevo con el ron por 2 minutos. Añada una de las leches y la canela. Mezcle el resto de los ingredientes en licuadora en tandas. Mezcle bien todo lo unido. Vierta en botellas limpias. Guarde refrigerado.

Ron Perfumado

1 botella de ron oro de carácter
2 rajitas de canela
1 vaina de vainilla abierta
2 granos de malagueta
4 a 5 clavos de olor.

Coloque las especias en la botella de ron y tape. Se tarda de 3 a 4 semanas en adquirir gusto.

Ron perfumado Rápido:

1taza de ron oro
5 clavos de especias
1 rajita de canela
1 cda de vainilla
1 cáscara de china
En una cacerola caliente el ron hasta que comience a hervir. Retire del fuego seguida y añada las especias. Tape y deje reposar hasta que esté fresco. Cuele y utilice.

Ponche crema

En países como Venezuela esta es la crema de navidad.
6 huevos
Cascara de uno a 2 limones
3 latas de leche condensada
2 latas de leche evaporada
1 botella de ron oro o brandy
1oz de angostura

Incorpore las leches a los huevos sin batir. Añada la cascara y ron. Cocine a fuego bajo moviendo todo el tiempo hasta que espese. Elimine la cascara. Añada la angostura, cuele y coloque en botellas. Refrigere.

Rompope

Esta crema nos viene de Méjico.
6 clavos de olor
1 rajita de canela de 4”
2 tazas de ron
6 tazas de leche
2-1/2 tazas de azúcar
_ taza de almendras peladas y molidas
15 yemas de huevo
1/4 cdta de nuez-moscada

Marine los clavos y la canela en el ron por 24 horas. Hierva la leche y azúcar. Agregue las almendras y reduzca a temperatura baja y cocine por 5 minutos. Retire del fuego. Bata las yemas hasta espesas y claras. (5 a 10 minutos) añada a la yemas 1 taza de la leche y bata bien. Vierta la leche con las yemas al resto de la leche y cocine a fuego mediano moviendo todo el tiempo hasta que espese (10 minutos). Elimine los clavos y canela del ron y añada a la leche. Refrigere. Sirva con un poco de nuez moscada.

Crema de vie

Original de Francia pero se toma mucho en Argentina y Colombia.
1 lata de leche condensada
1 lata de leche evaporada
6 yemas de huevo
2 tazas de azúcar
1 taza de agua
1 cdta de vainilla
_ taza de ron

Haga un almíbar con el agua y azúcar (que llegue a 250 grados en termómetro de dulce) Bata las yemas con el ron hasta unidas. Agregue las leches y vainilla. Por ultimo añada el almíbar mezclando bien. Coloque en botellas y refrigere.
Coloque las especias en la botella de ron y tape. Se tarda de 3 a 4 semanas en adquirir gusto.

Cheers,

Jackie :)

look for more!

Related Posts Plugin for WordPress, Blogger...